Low-level API integration
Allows you to build your own custom UI on top of our low-level APIs.
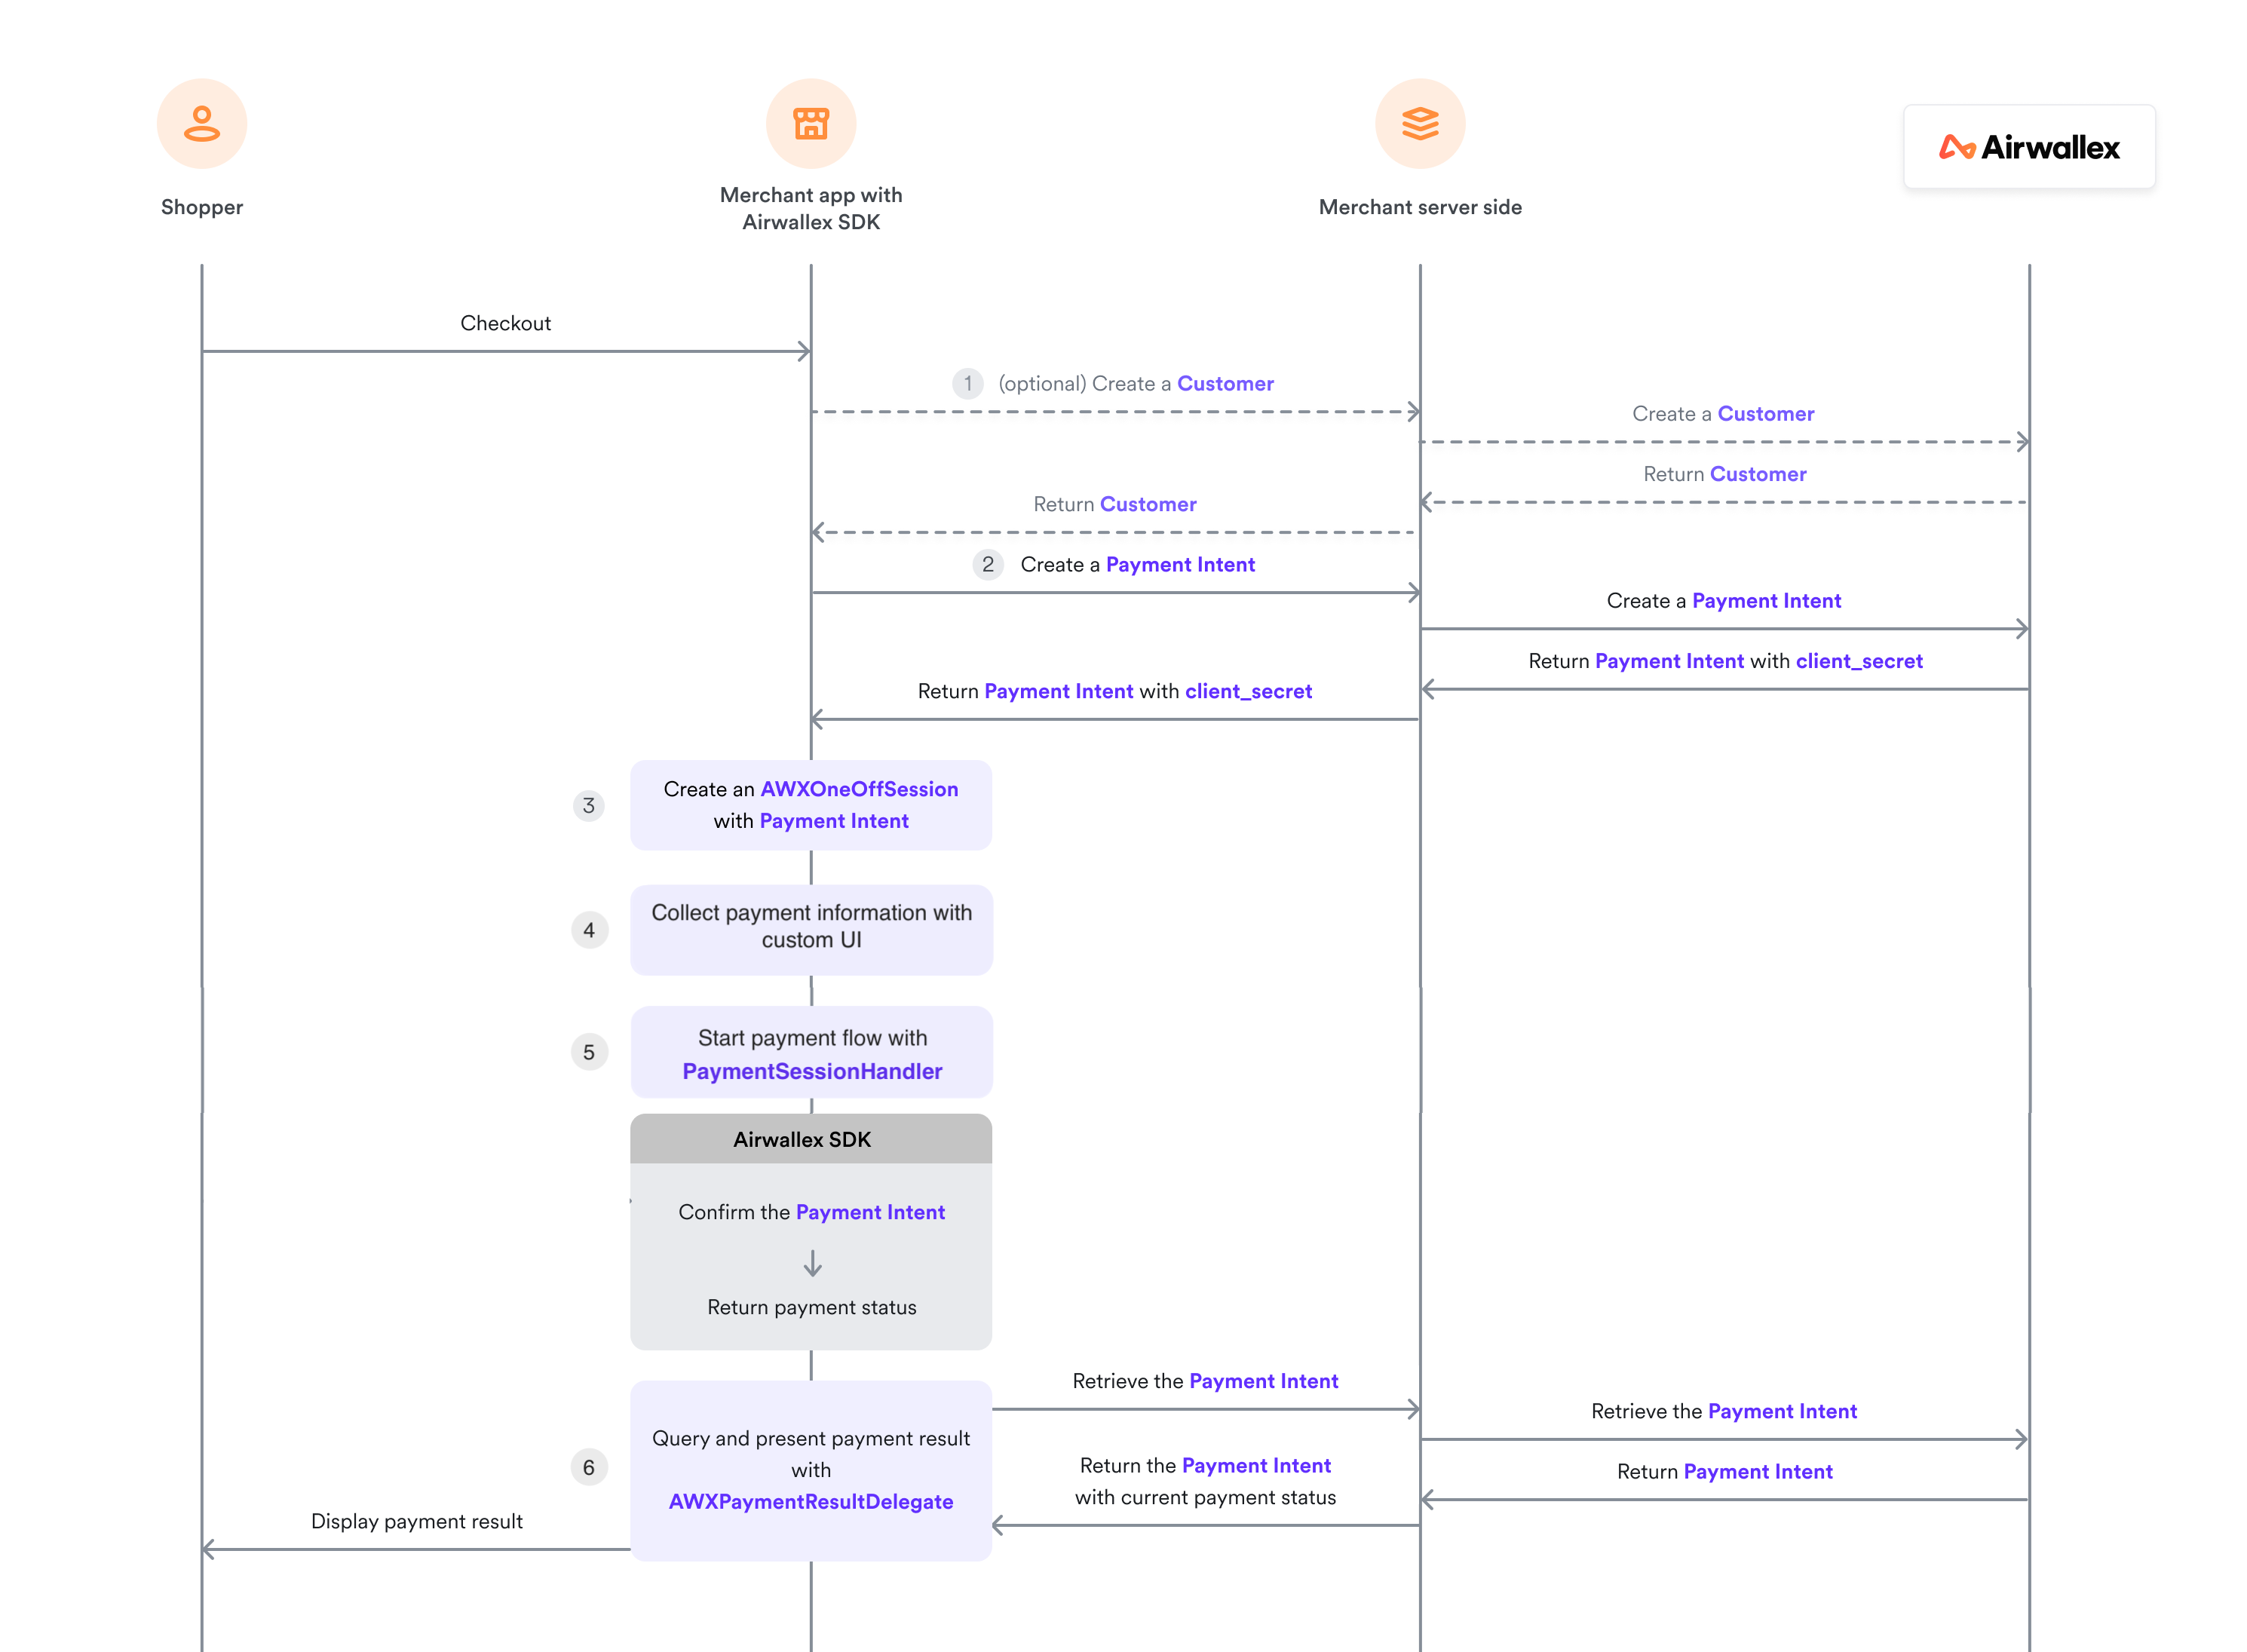
Step 1: (Optional) Create a Customer
Create a Customer object and pass it to your server if you want to save your customer's details and attach payment information to this object. Note that this step is compulsory when you process recurring payments for a new customer.
From your server, access Airwallex API to Create a Customer API.
Step 2: Create a PaymentIntent
Your client app will need a PaymentIntent to create a payment session for Airwallex SDK to present a payment flow.
From your server, access Airwallex API to Create a PaymentIntent API and pass the returned PaymentIntent to the client app.
Step 3: Create a PaymentSession
Create a PaymentSession with all the order related information and payment type information. Ensure you include the merchant identifier information received after registering on Apple developer portal. See Enable Apple Pay for iOS.
1let session = AWXOneOffSession()2session.countryCode = "Your country code"3session.billing = "Your shipping address"4session.returnURL = "App return url"5session.paymentIntent = paymentIntent; // PaymentIntent created for this order
1// Required for ApplePay2let options = AWXApplePayOptions(merchantIdentifier: applePayMerchantId)3options.additionalPaymentSummaryItems = [4 .init(label: "goods", amount: 10),5 .init(label: "tax", amount: 1)6]7options.merchantCapabilities = [.threeDSecure, .debit]8options.requiredBillingContactFields = [.postalAddress]9options.supportedCountries = ["AU"]10options.totalPriceLabel = "COMPANY, INC."1112session.applePayOptions = AWXApplePayOptions(merchantIdentifier: "Your Merchant Identifier")
Step 4: Collect payment information using custom UI
For native UI integration, this step is handled by the Airwallex-provided UI. For low-level API integration, you must implement your own UI to collect all the information required for payment.
PCI-DSS compliance
For card payment, your app must be PCI-DSS compliant if using Confirm card payment with card and billing details flow. Provide a PCI-DSS AOC and renew it regularly.
For redirect payments, make sure you collect all the required information (e.g. shopper phone number, email) specified in the response from Get available payment method types API.
Step 5: Start payment flow with PaymentSessionHandler
Create PaymentSessionHandler
1let paymentSessionHandler = PaymentSessionHandler(2 session: "The session created above",3 viewController: "hosting view controller which also handles AWXPaymentResultDelegate"4)5// store the `paymentSessionHandler` in your view controller or class that is tied to your view's lifecycle6self.paymentSessionHandler = paymentSessionHandler
Pay with card
1// Confirm intent with card and billing2paymentSessionHandler.startCardPayment(3 with: "The AWXCard object collected by your custom UI",4 billing: "The AWXPlaceDetails object collected by your custom UI"5)
Pay with a saved card (consent)
- Pay with a consent object: Confirm intent with a payment consent object
AWXPaymentConsent
1paymentSessionHandler.startConsentPayment(with: "payment consent")
- Pay with a consent ID: Confirm intent with a valid payment consent ID only when the card is saved as network token
1paymentSessionHandler.startConsentPayment(withId: "consent ID")
Pay with Apple Pay
 Make sure you have set up
 session.applePayOptions correctly.
1paymentSessionHandler.startApplePay()
Pay with Redirect
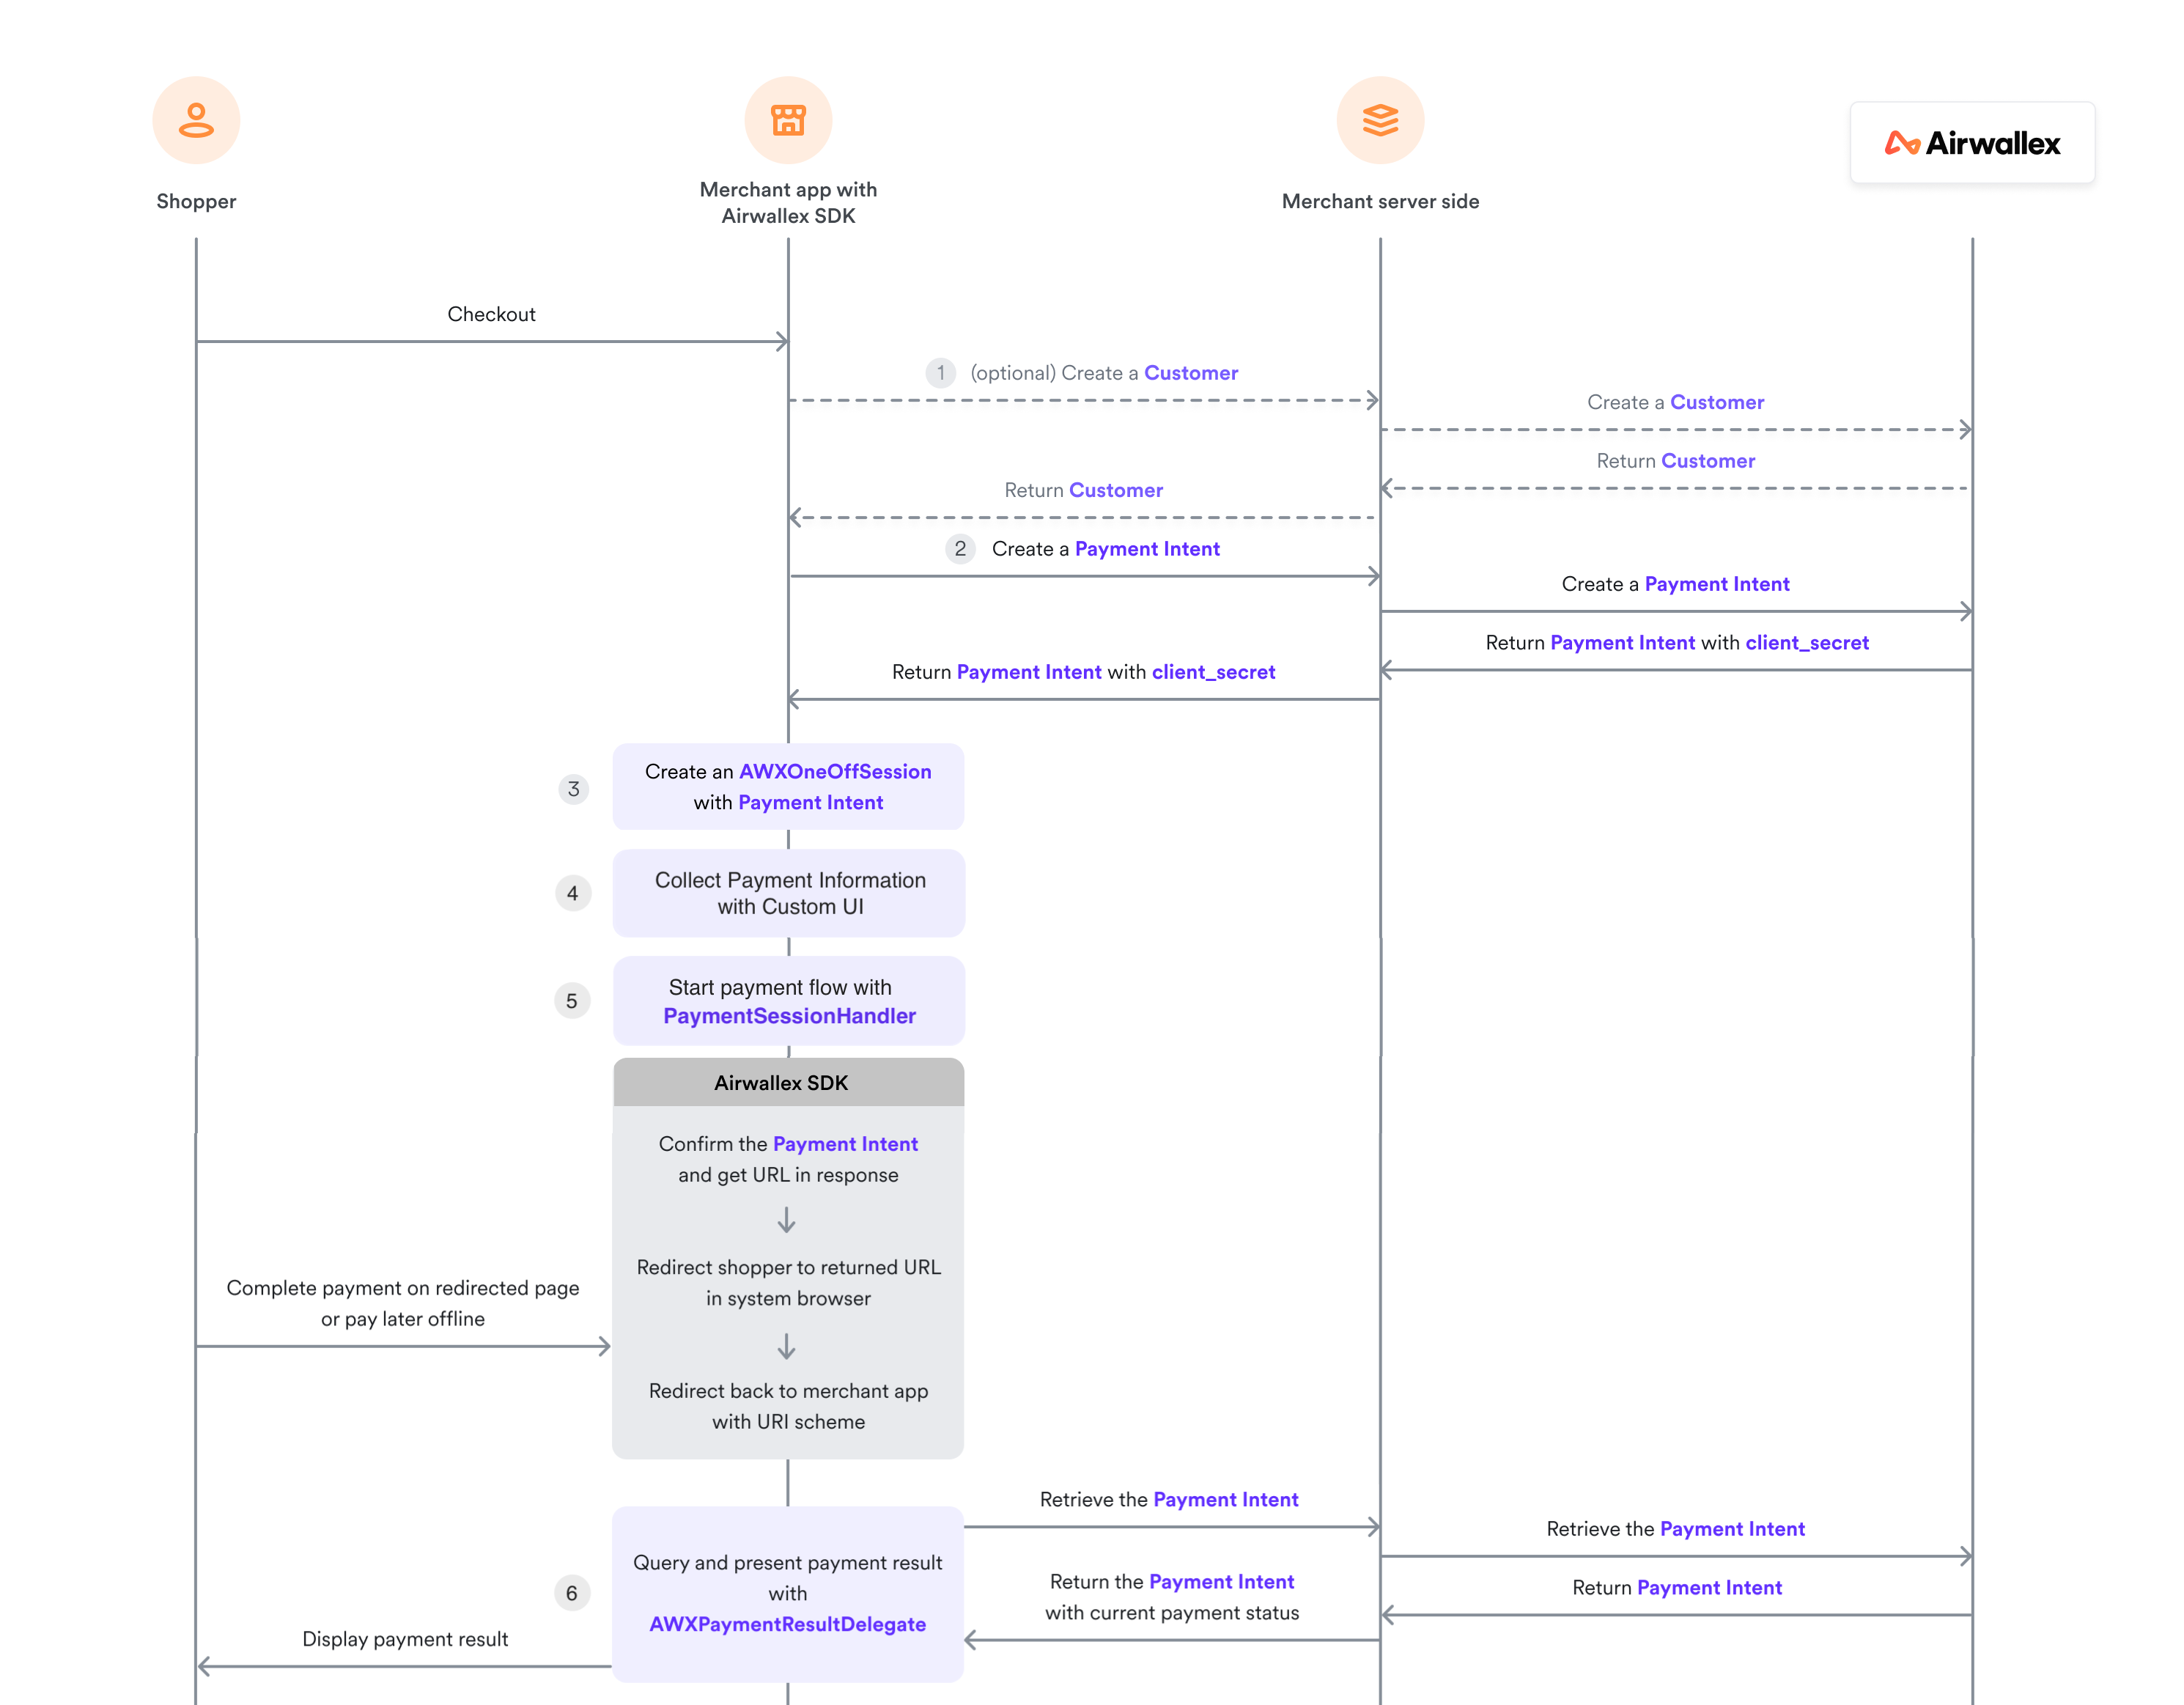
1paymentSessionHandler.startRedirectPayment(2 with: "payment method name",3 additionalInfo: "all required information"4)
Step 6: Query and present payment result
After the PaymentIntent is confirmed by SDK, this delegate will be called by the SDK automatically and you can check the status to see whether the payment process has completed or not.
1# MARK: - AWXPaymentResultDelegate2func paymentViewController(_ controller: UIViewController?, didCompleteWith status: AirwallexPaymentStatus, error: Error?) {3 // call back for status success/in progress/ failure / cancel4}