Custom domains (Beta)
Learn how to set up your own custom domain for Payment Links to create a personalized experience and more trust for your shoppers! Adding custom domains is a paid feature at only $10USD a month.
The custom domains feature is currently in Beta. To try it out, submit a request using the instructions below.
What are custom domains?
Payment links are hosted on pay.airwallex.com, this means that shoppers will see the url in their browser as pay.airwallex.com/link_code. Custom domains for payment links allows you to use your own domain when sharing links with your customers. For example you can use your domain such as pay.coconut.com and your customers will see that when making payment
Add your custom domain to Airwallex
- Decide which subdomain to use with your Payment Links
*Note: If your domain is example.com, we recommend using payments.example.com as your custom subdomain. You can replace payments with anything you like, as long as it's a valid subdomain. You can’t use a path like example.com/checkout and must specify a subdomain of your existing domain. *
After you decide on a subdomain, let us know the required details via this form before proceeding to complete the configuration below
Identify your DNS Provider
- Identify your DNS Provider
To start, figure out what service is managing your DNS records, so you know exactly where to login and create the new records. If you already know your DNS provider, you can move on to the next section. Often, it’s the same place you registered your domain, but sometimes the DNS provider is different from your domain registrar. If you’re not certain who your DNS provider is, try looking up your domain’s name servers, replacing airwallex.com with your own domain in this command:
1nslookup -querytype=NS airwallex.com
You'll see a list of name servers for your domain in the output. Here's an example output for airwallex.com:
It looks like AWS is providing our DNS here:
1airwallex.com nameserver = ns-423.awsdns-52.com.2airwallex.com nameserver = ns-705.awsdns-24.net.3airwallex.com nameserver = ns-1087.awsdns-07.org.4airwallex.com nameserver = ns-1882.awsdns-43.co.uk.
You can also use a browser-based tool to check your provider, go to MXLookup’s DNS Lookup tool and enter your domain. It might be able to tell you who your DNS provider is.
Create DNS Records
These are standard instructions for creating your DNS records. If you have issues with any of the steps, please contact your DNS provider for more assistance.
-
Sign into your DNS Provider
Most DNS providers have a control panel you can sign into to manage your DNS settings. Find your provider’s control panel page and sign in.
-
Find the page to manage the DNS for your domain
Now that you’re logged in, find where you can manage the DNS records for your domain in your provider’s control panel. If you’re having issues finding the right page, you can: See if your DNS provider has a help article for adding new DNS records that can point you in the right direction. Contact your DNS provider for additional support.
-
Create your CNAME record
From your DNS control panel, add a new record that maps your desired subdomain to . Most DNS providers ask you for the record type, name, value, and TTL or expiration when creating a new record.
Enter these values and save the new DNS record:
Field Instructions Description Type Select CNAME from the dropdown The type of DNS record this is. Name If your custom subdomain is checkout.example.com, entercheckoutFor CNAME records, this field is the first part of your subdomain (the part leading up to the first period). Value Enter www-direct.airwallex.comThis is what the new subdomain record points to–in this case, Airwallex. Some providers may expect a trailing period (.) after the CNAME value. Ensure you adhere to your provider's format requirements. TTL/Expiry Enter 300 An expiration of 5 minutes (300 seconds) is OK. Your DNS provider might not allow you to change the TTL value. If this field is missing or you can't change it, it's safe to ignore this part of the configuration. -
Create a CNAME record for certification purposes
From your DNS control panel, add a new CNAME record.
Note: This CNAME record lets us verify that you're the owner of this domain. This is required to issue TLS certificates for your domain, so you can continue to accept payments securely.
Enter these values into the form and save the new DNS record
Field Instructions Description Type Select CNAME from the dropdown The type of DNS record this is. Name Enter _acme-challenge.<sub_domain>. For example, if your custom domain is checkout.example.com, enter_acme-challenge.checkout.For CNAME records, this field is the subdomain portion of your domain. Value <hostname>.0f71bdc8ac2ecec4.dcv.cloudflare.comInsert your host name for the value creation. For example, if my host name is checkout.example.comthe value will becheckout.example.com.0f71bdc8ac2ecec4.dcv.cloudflare.comTTL/Expiry Enter 300 An expiration of 5 minutes (300 seconds) is OK. Your DNS provider might not allow you to change the TTL value. If this field is missing or you can't change it, it's safe to ignore this part of the configuration.
Verify your DNS CNAME Records
-
After you save your DNS record, verify that it has the correct values.
Wait up to 10 minutes for your DNS provider to update its nameservers. Replace checkout.airwallex.me with your custom domain in the following command and run it from your terminal:
nslookup -querytype=CNAME checkout.example.comYou should see the following output
checkout.example.com canonical name = www-direct.airwallex.com.When you see that output, move onto the next step.
-
Verify your CNAME Record
After you save your DNS record, verify that it has the correct values.
Wait up to 10 minutes for your DNS provider to update its nameservers. Replace checkout.example.com with your custom domain in the following command and run it from your terminal:
nslookup -querytype=CNAME _acme-challenge.checkout.example.comYou should see output like below:
_acme-challenge.checkout.example.com canonical name = checkout.example.com.0f71bdc8ac2ecec4.dcv.cloudflare.comIf you don't see your unique CNAME record value in the output, wait a bit longer and try running the command again.
When you finish this step, your DNS records are configured.
Final Steps
Now that you've created your DNS records and verified them, Airwallex will verify the connection and provisions your domain on our end. We'll send you an email on the email provided in the form above when the domain is ready for you to start using and creating payment links with.
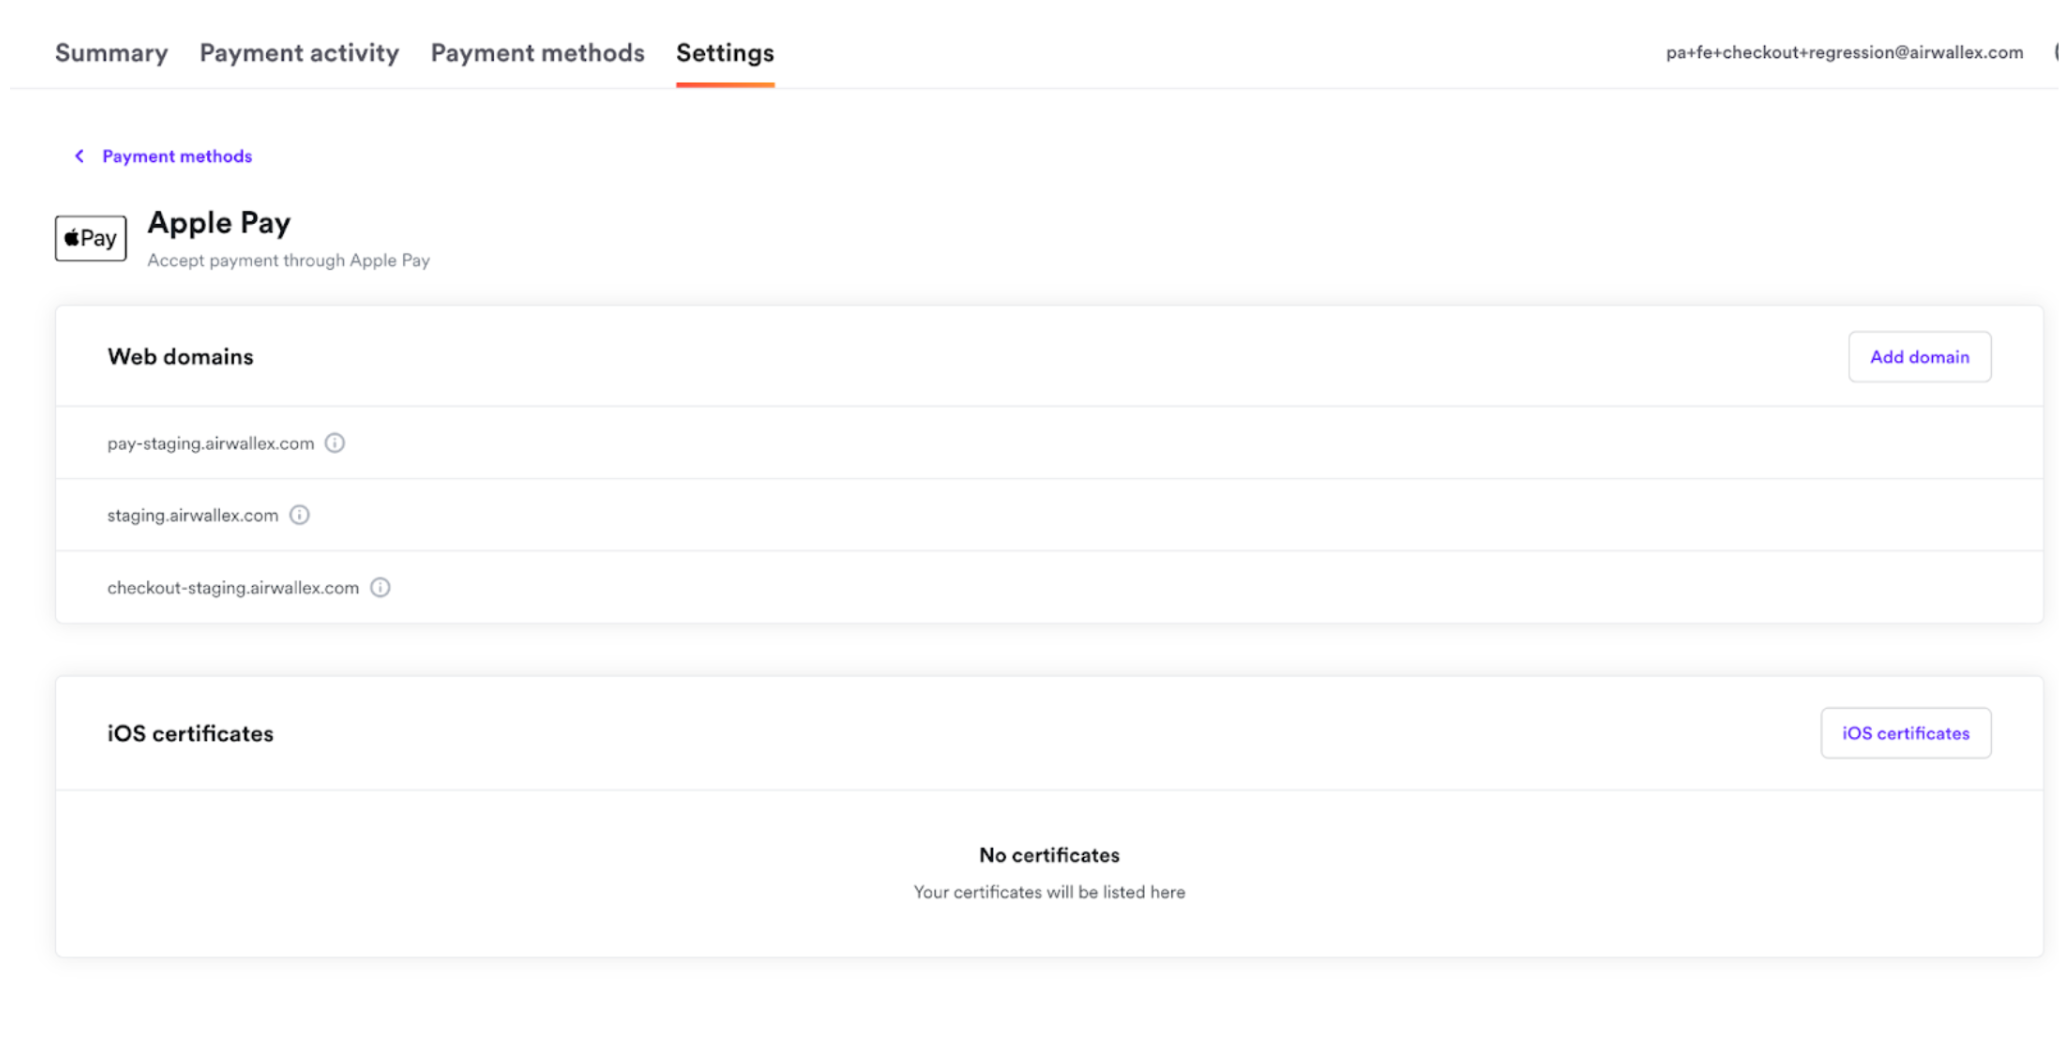
Add web domains to Apple Pay
If you are offering Apple Pay to your customers, you will also have to add the new custom domains for Apple Pay in the Airwallex web app.
Steps:
- Visit Payments > Payment Methods >
- Search for Apple Pay and click Manage
- Add your new custom domain under Add Domain