Embedded Payment Element integration
AWXPaymentElement provides a flexible way to embed payment UI directly into your own view hierarchy. Unlike AWXUIContext.launchPayment() which presents a full payment sheet as a view controller, AWXPaymentElement returns a UIView that you can place anywhere in your layout.
Make sure you add dependency for Airwallex or AirwallexPaymentSheet.
Keep in mind that:
- The embedded view requires Auto Layout constraints for proper sizing.
- The view's height updates automatically based on content.
- Keyboard handling is the host app's responsibility.
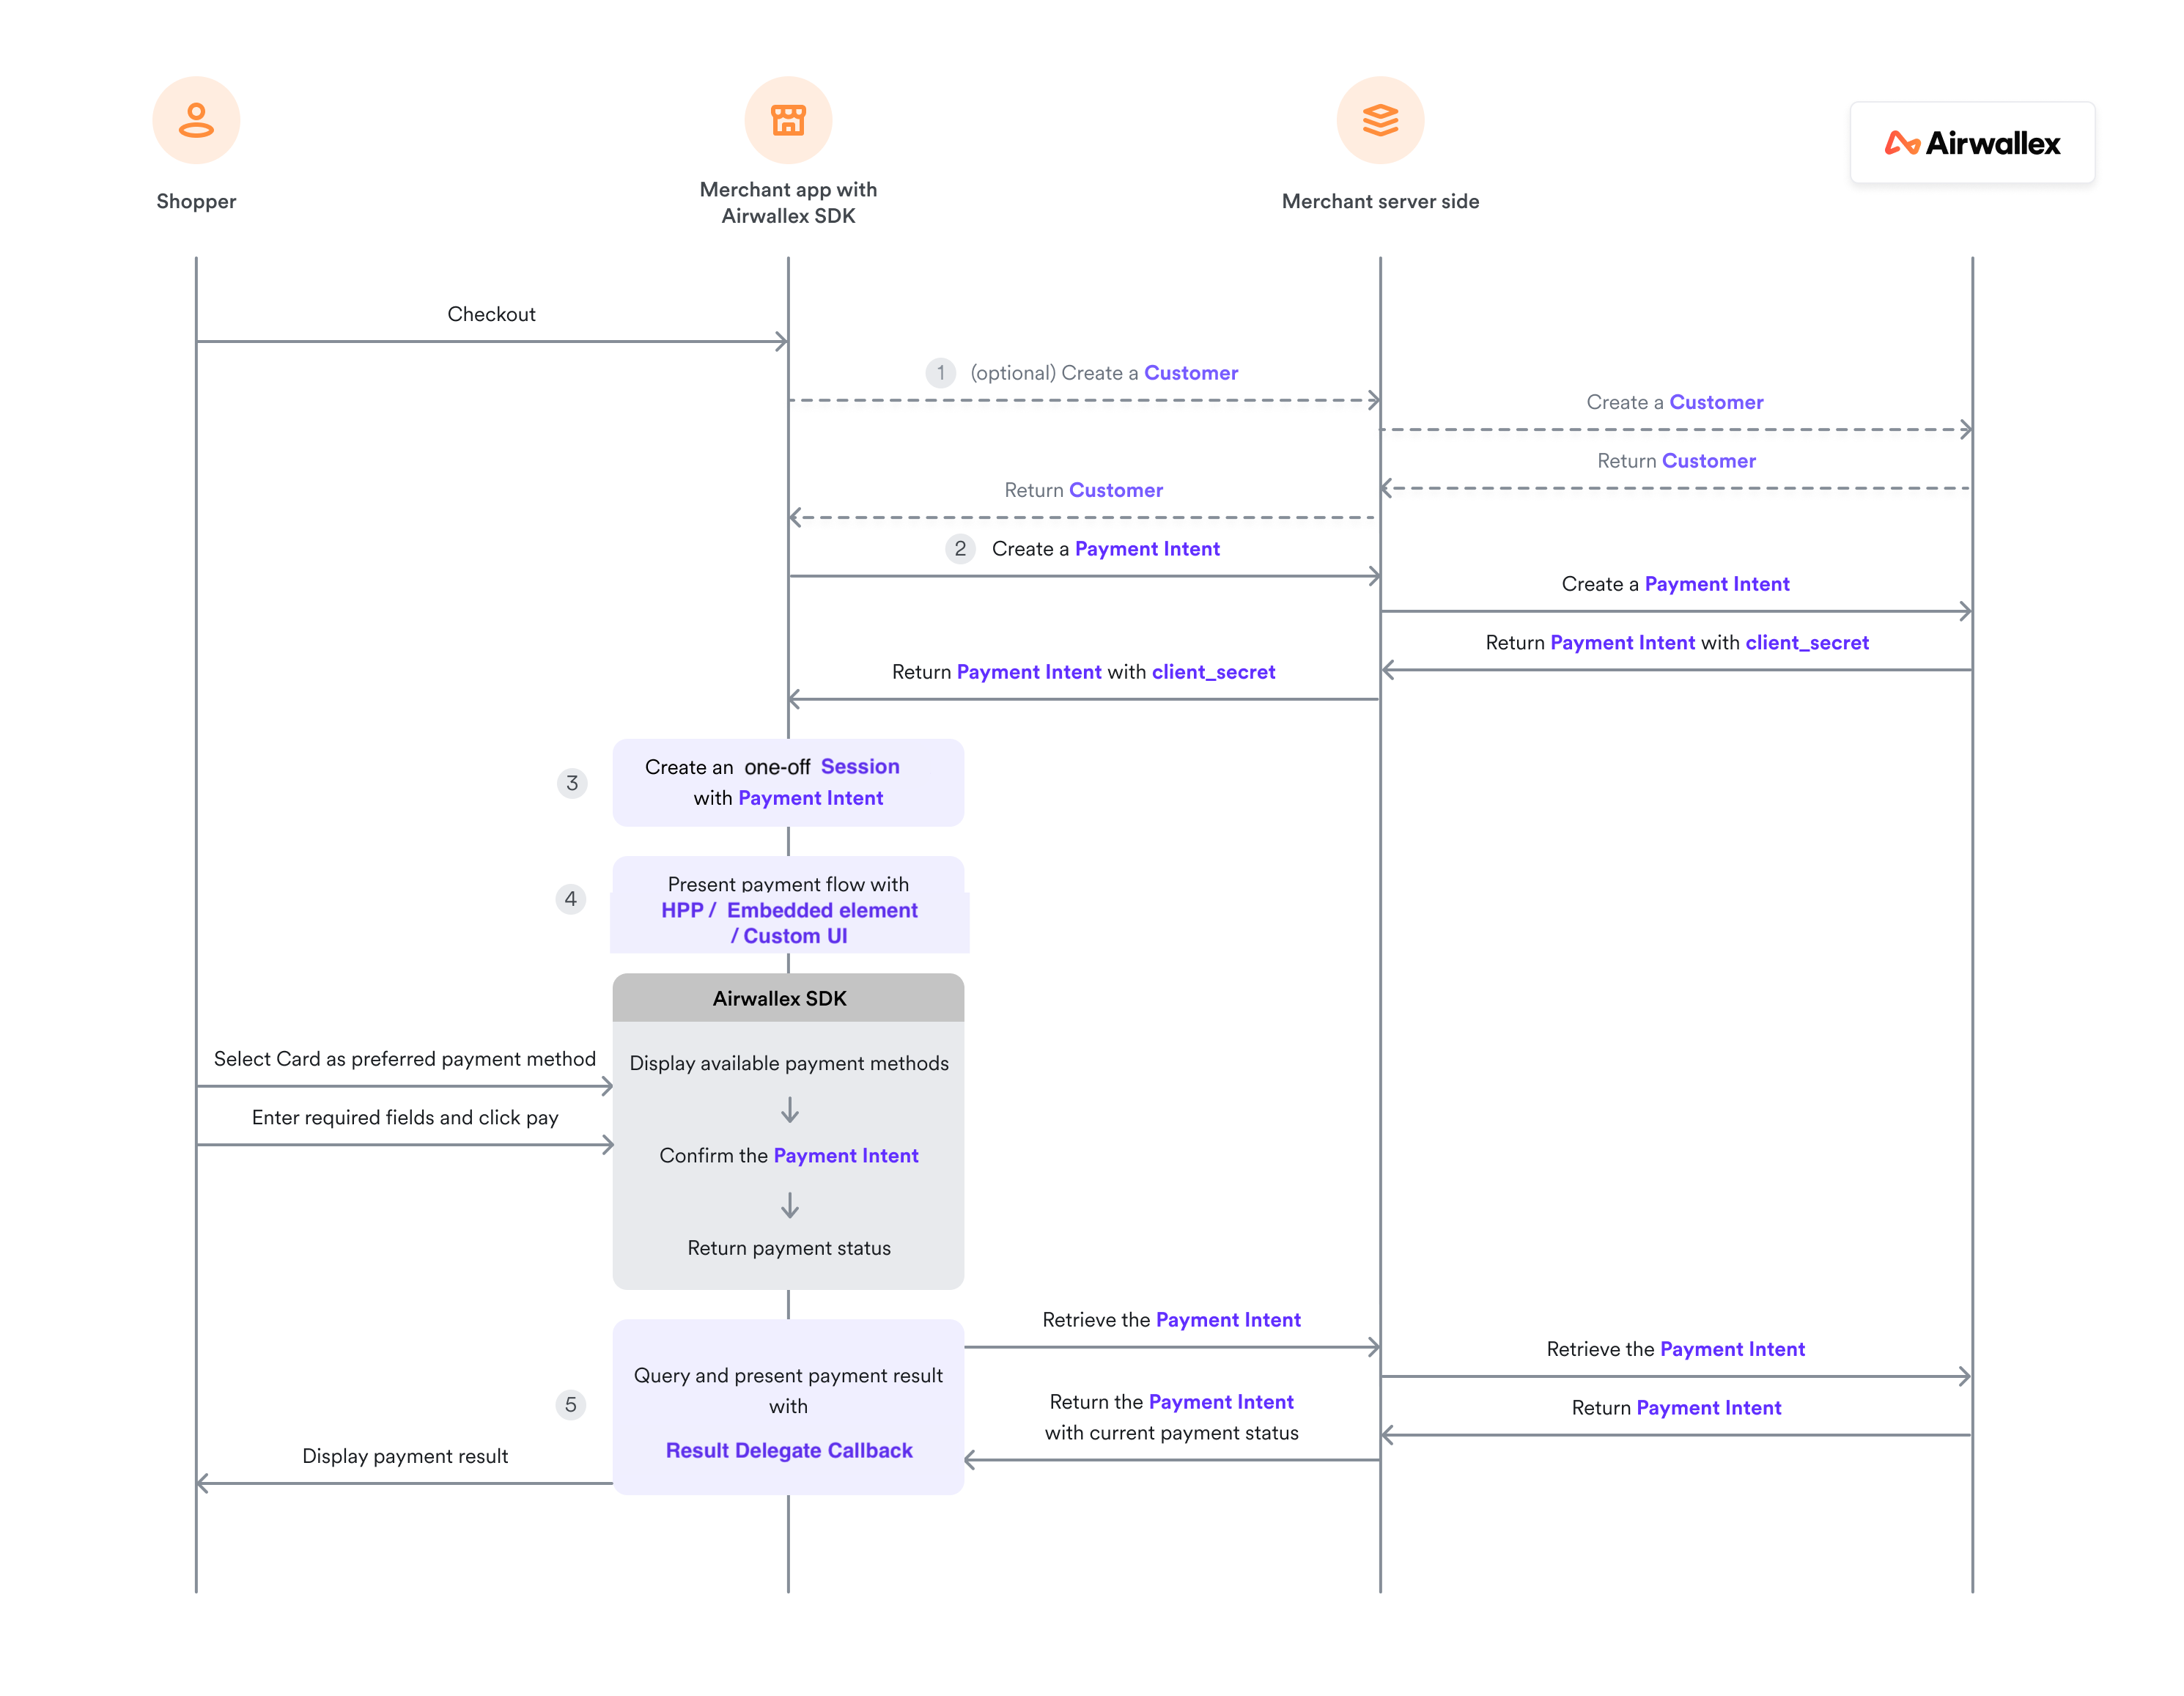
How it works
The diagram below depicts the integration flow for a card payment.
Prepare payment session
Before creating the embedded element, you need to create a payment session. See Prepare payment session for details on setting up the environment, creating a customer, payment intent, and payment session.
Create embedded payment sheet (recommended)
Display a list of available payment methods inside your own view hierarchy.
1let configuration = AWXPaymentElement.Configuration()2configuration.layout = .tab // or .accordion34let element = try await AWXPaymentElement.create(5 session: session,6 delegate: self, // AWXPaymentElementDelegate7 configuration: configuration8)910// Add the element's view to your view hierarchy11let paymentView = element.view12paymentView.translatesAutoresizingMaskIntoConstraints = false13containerView.addSubview(paymentView)
Create embedded card element
Display only the card payment form for adding new cards.
1let configuration = AWXPaymentElement.Configuration()2configuration.elementType = .addCard3configuration.supportedCardBrands = [.visa, .mastercard, .unionPay] // defaults to all available brands45let element = try await AWXPaymentElement.create(6 session: session,7 delegate: self, // AWXPaymentElementDelegate8 configuration: configuration9)1011// Add the element's view to your view hierarchy12let paymentView = element.view13paymentView.translatesAutoresizingMaskIntoConstraints = false14containerView.addSubview(paymentView)
Configuration options
We provide tab and accordion styles for our embedded payment sheet:
| Tab | Accordion |
|---|---|
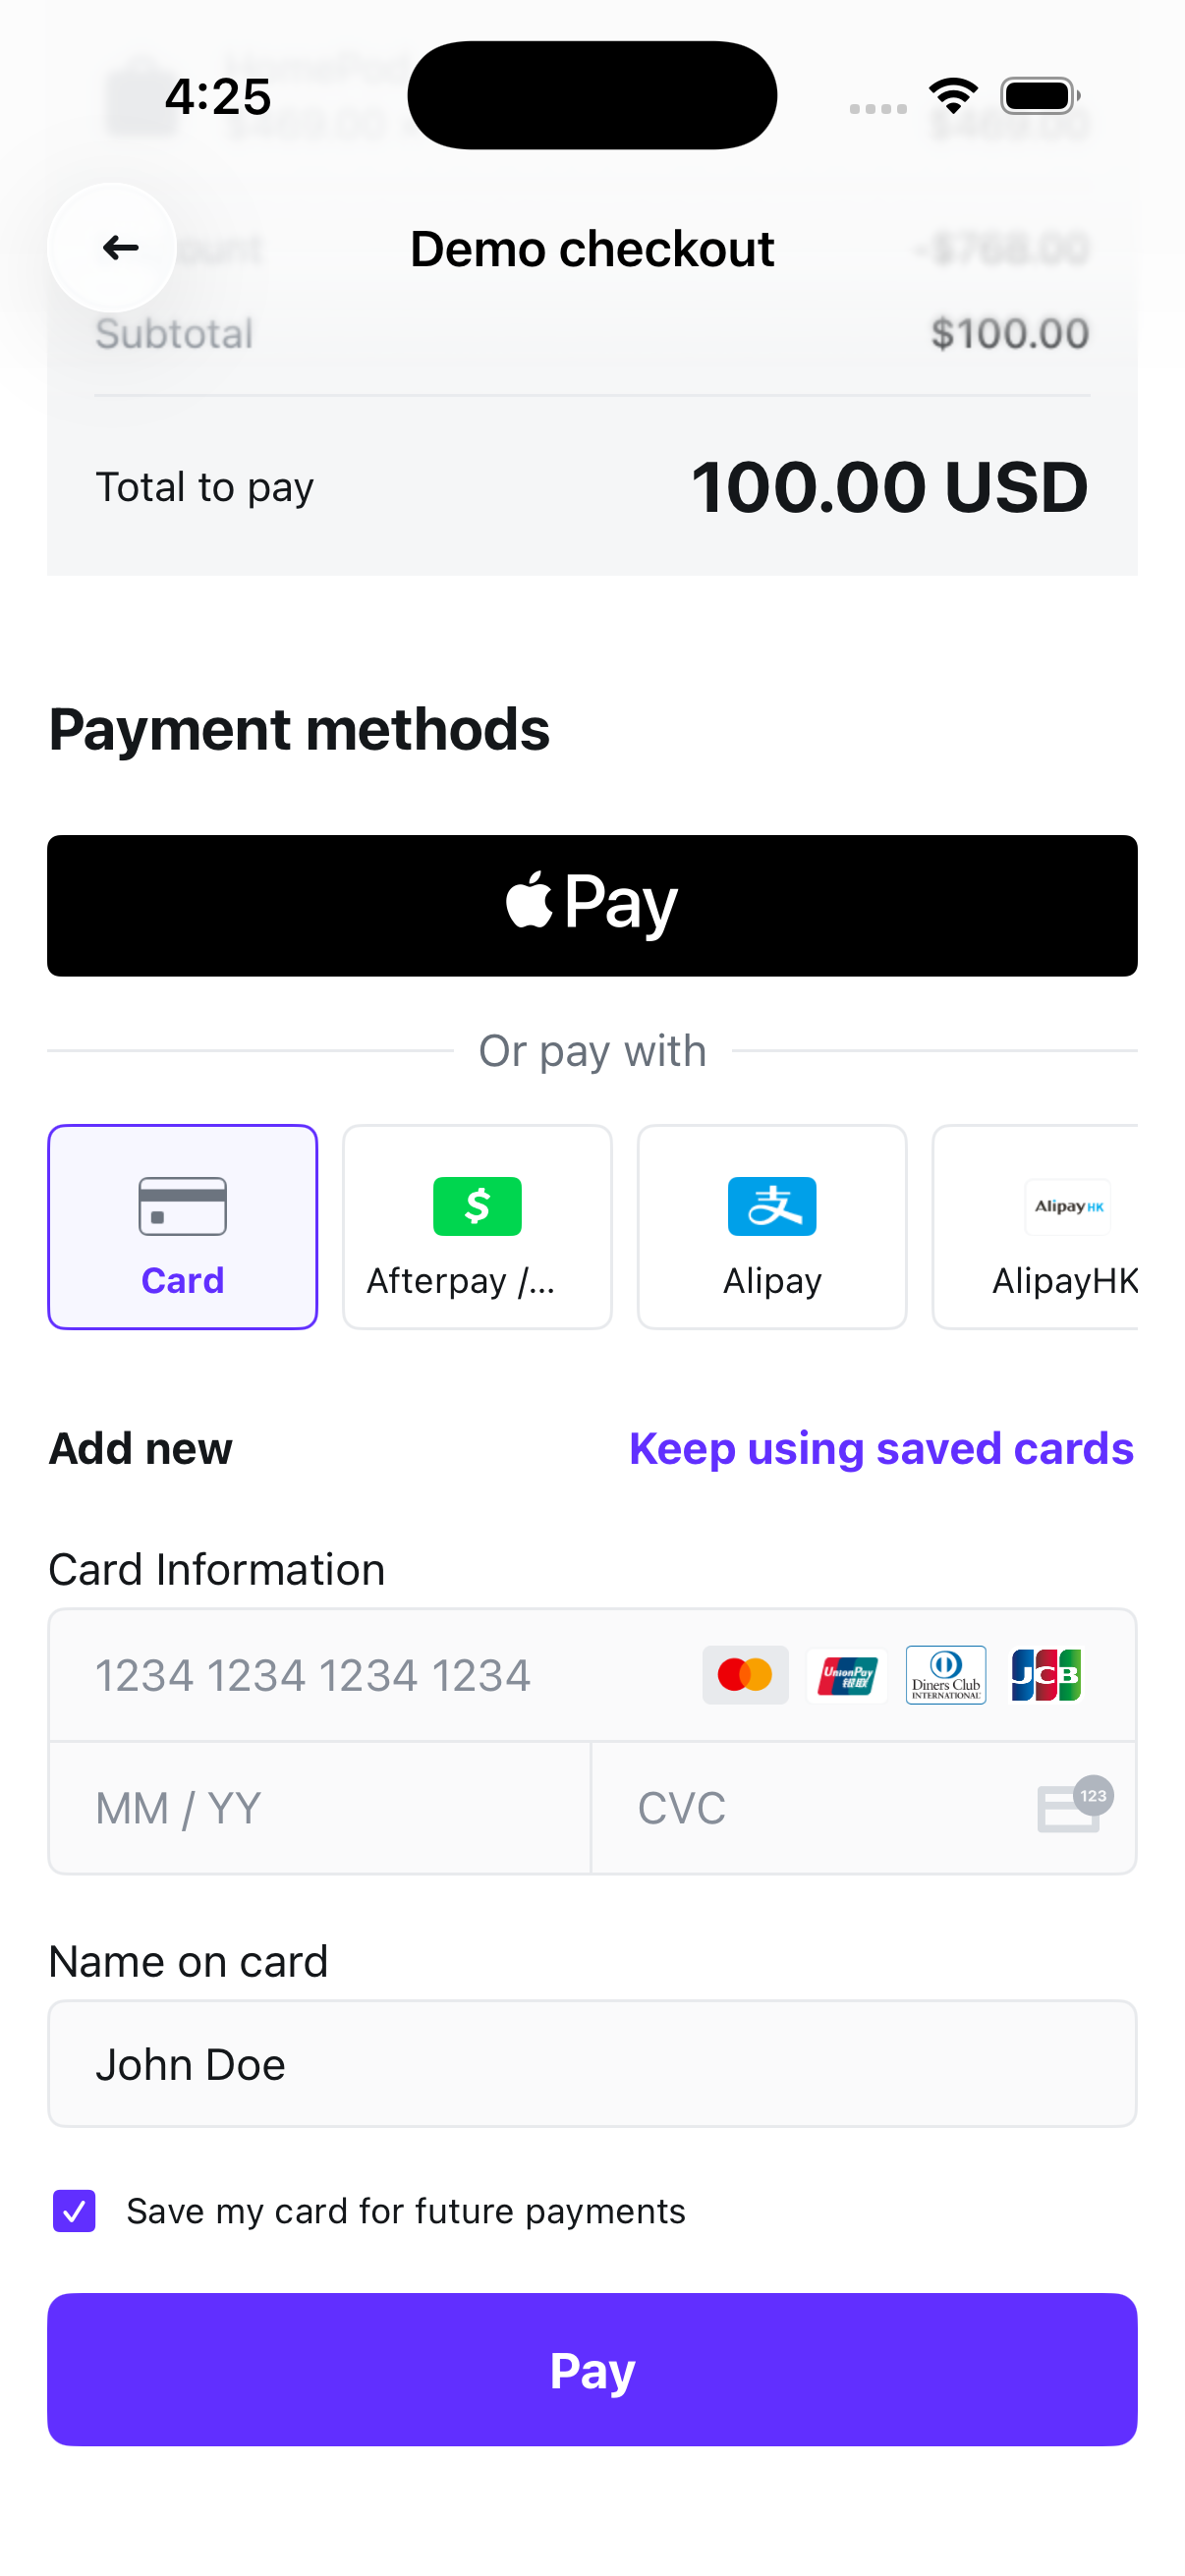 | 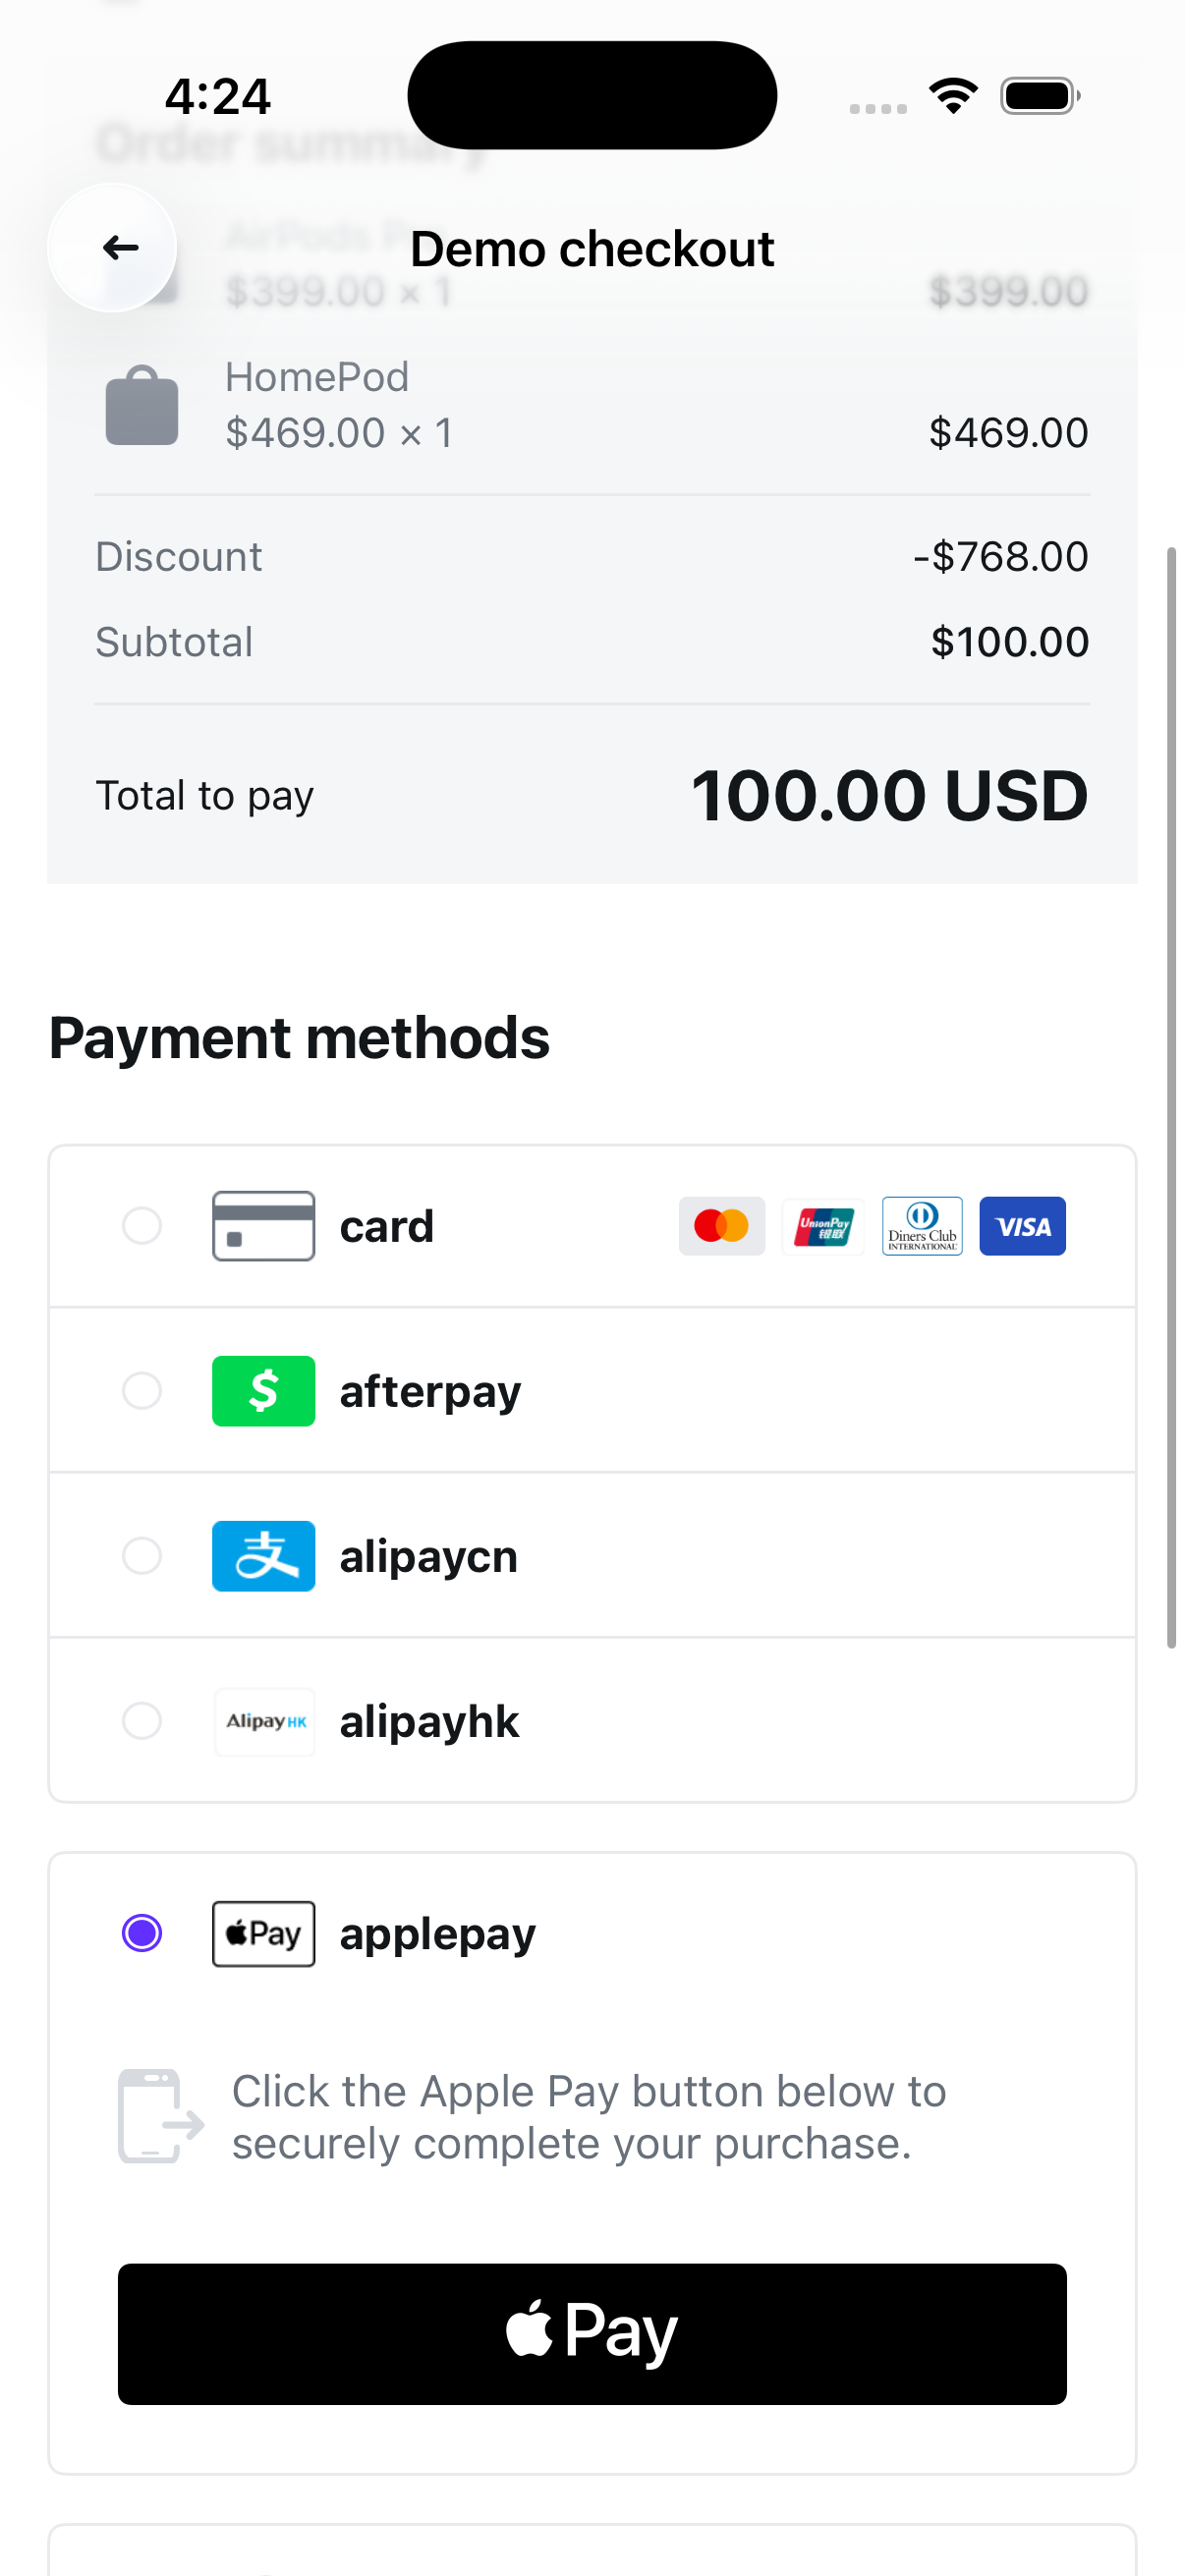 |
Other configuration options
| Property | Description | Default |
|---|---|---|
elementType | .paymentSheet (all payment methods) or .addCard (card only) | .paymentSheet |
layout | .tab or .accordion (only applies to .paymentSheet) | .tab |
supportedCardBrands | Accepted card brands (only applies to .addCard) | All available brands |
applePayButton | Customize Apple Pay button appearance (for example, showsAsPrimaryButton, buttonType, disableCardArt) | — |
checkoutButton | Customize checkout button (for example, title) | — |
appearance.tintColor | Primary brand color used throughout the payment element | SDK default |
Handle payment element events
Implement AWXPaymentElementDelegate to receive payment lifecycle callbacks.
1extension YourViewController: AWXPaymentElementDelegate {2 // Required - called when payment completes3 func paymentElement(4 _ element: AWXPaymentElement,5 didCompleteFor paymentMethod: String,6 with status: AirwallexPaymentStatus,7 error: Error?8 ) {9 // call back for status success / in progress / failure / cancel10 }1112 // Optional - show/hide your own loading indicator13 func paymentElement(14 _ element: AWXPaymentElement,15 onProcessingStateChangedFor paymentMethod: String,16 isProcessing: Bool17 ) {18 // Show or hide loading indicator19 }2021 // Optional - called when a payment consent is created22 func paymentElement(23 _ element: AWXPaymentElement,24 didCompleteFor paymentMethod: String,25 withPaymentConsentId paymentConsentId: String26 ) {27 // Store consent ID for future use28 }2930 // Optional - scroll invalid input field into view31 func paymentElement(32 _ element: AWXPaymentElement,33 validationFailedFor paymentMethod: String,34 invalidInputView: UIView35 ) {36 let rect = invalidInputView.convert(invalidInputView.bounds, to: scrollView)37 scrollView.scrollRectToVisible(rect, animated: true)38 }39}
Retrieve the payment result
For any actions subsequent to the payment such as shipping goods or sending email receipts, you can retrieve the payment result using the following options:
-
Webhooks: Set up webhooks to receive notifications related to payment lifecycle events. For example, Airwallex sends the
payment_intent.succeededevent when a payment succeeds. To build a reliable integration, listen for these events rather than waiting for the client-side redirect. On the client, the shopper could close the browser window or quit the app before your return URL handler is executed. For information on how to set up webhooks and listen for events, see Getting started with webhooks. -
API: On your server, call Retrieve a PaymentIntent API to inspect the status of the PaymentIntent object API.
-
Web app: Check the Payment Activity screen on your Airwallex web app.